
Do you have a favorite painting with a tear in it so it’s hiding out? Don’t throw it out! Fix it yourself!
You can fix a tear in a painting yourself. It’s a lot easier than you think, even if it’s not perfect, no one will notice. And, it will be FABulous! I promise.
HOW TO FIX A TEAR IN AN OIL PAINTING
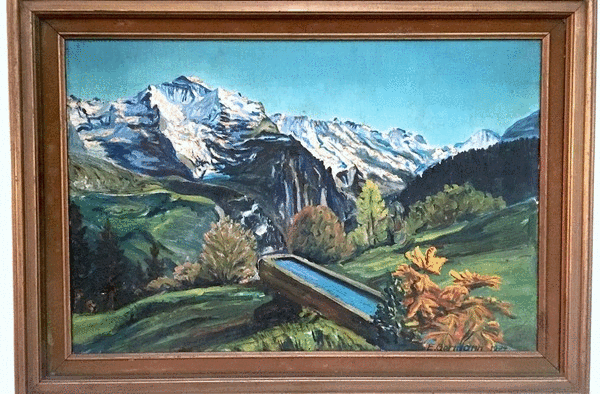
? ?HOW TO FIX A TEAR IN AN OIL PAINTINGHave you ever found an original oil painting in a thrift store you loved, but put it back because it had a tear in it?Have you ever poked a hole in a painting that you own? I have and it sucks.But, never fear! I'm going to show you how to salvage that painting and repair the tear. It's much easier than you think it's going to be.If you like this video & like to decorate with vintage art, you will like my other video:HOW TO HANG AN ART WALL?? Just click videos on the left side of this page, or go to the accompanying blog post. The link is in the first comment!
Posted by Marilynn Taylor • The Taylored Home on Wednesday, July 11, 2018
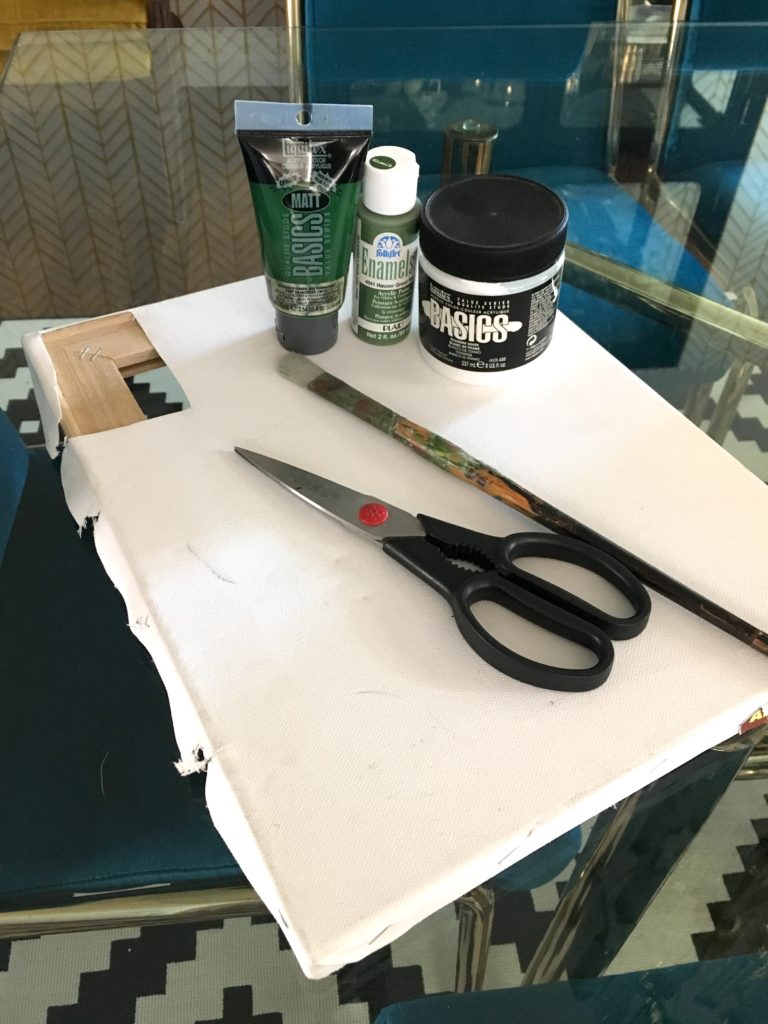
Here are the tools you’ll need to fix a tear:
- Oil or Acrylic craft paint in various shades so you can custom match the color
- canvas (pro tip: 99 cent store)
- small paintbrush
- scissors
- X-acto knife or small blade
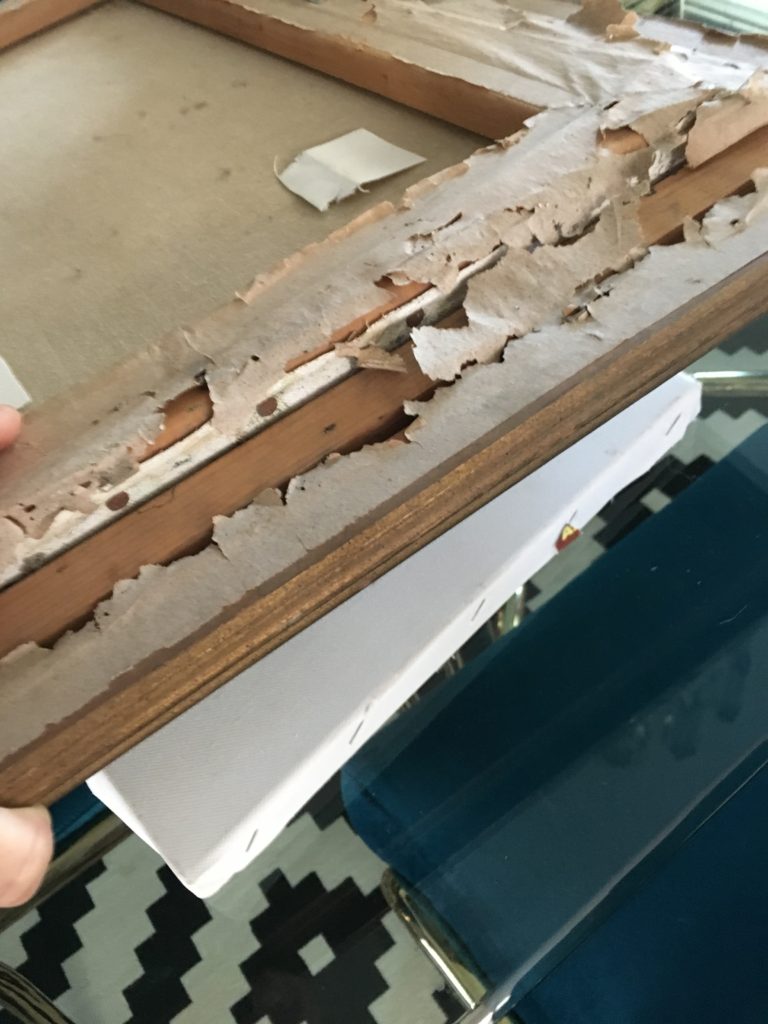
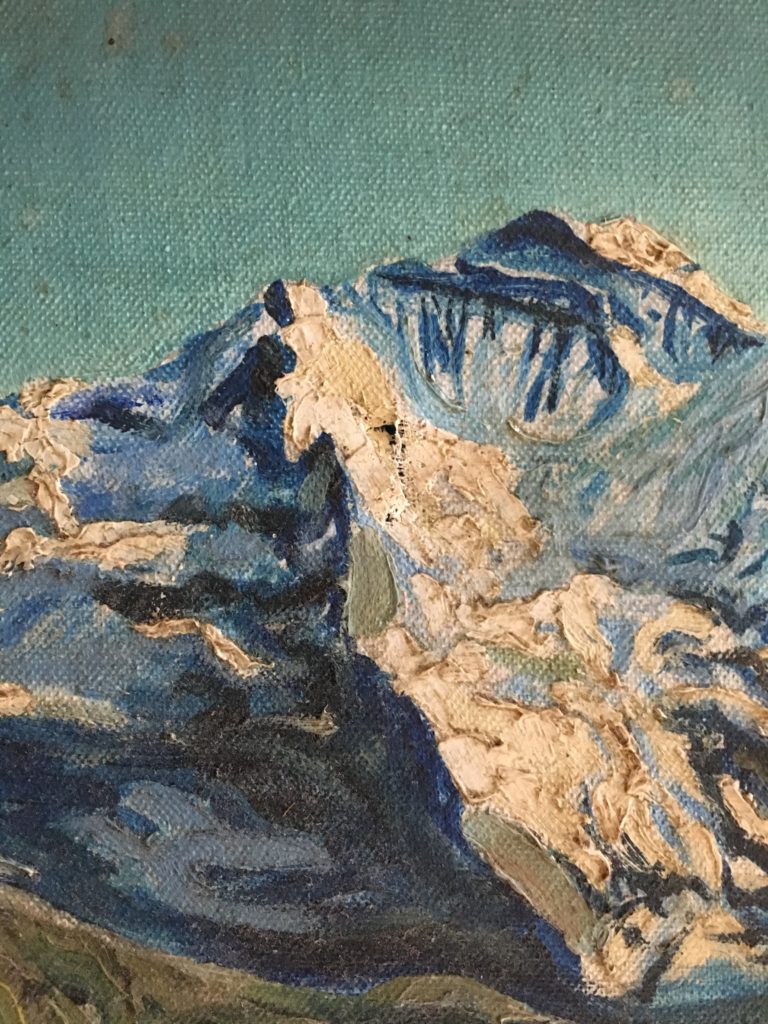
Flip the painting over and make sure the back is clean. You can use a vacuum to carefully vacuum up any dust or debris from the back of the painting.
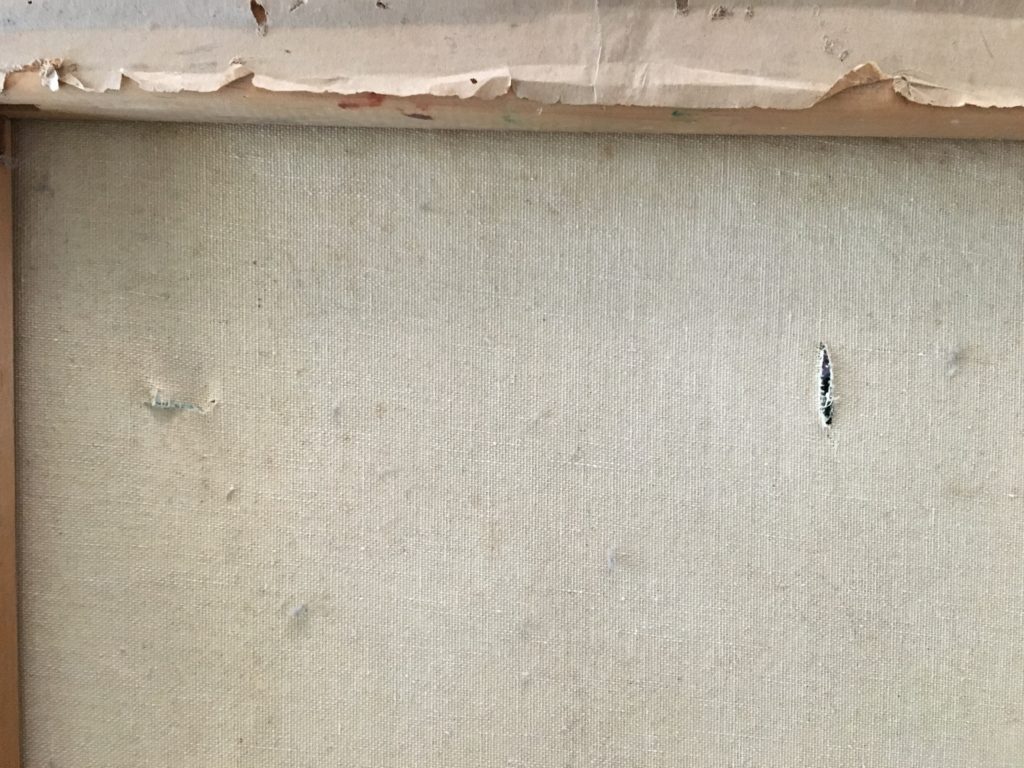
Cut pieces of canvas from the 99 cent store canvas that are a bit larger than the holes you would like to fix. Before you start the repair, make sure you support the painted side of the canvas so that it supports the canvas and to avoid making the tear larger or stretching out the canvas, which may crack the paint.
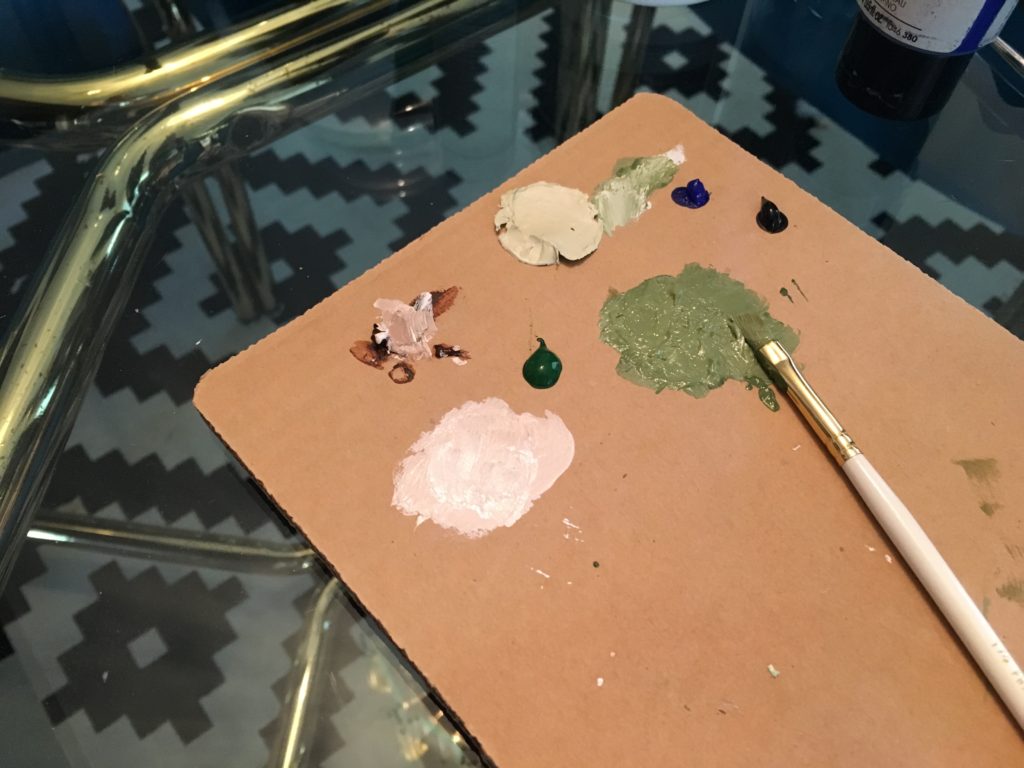
Color Matching
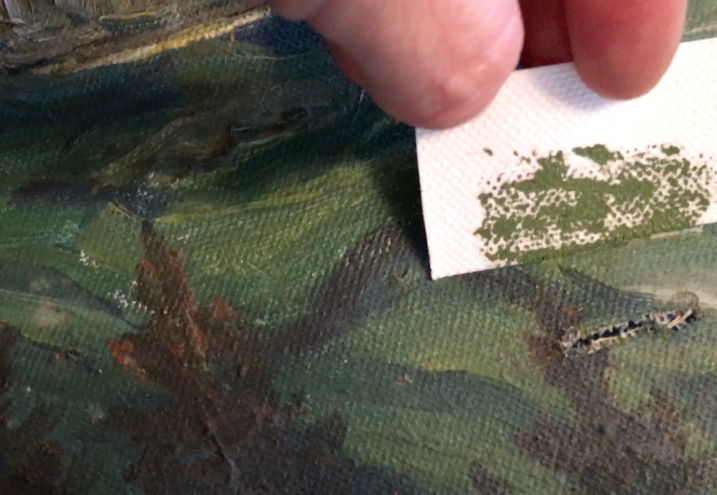
What color appears most in the area you want to fix? That is the color you want to match. If there is a blend of lighter and darker colors, go with the lighter colors, because you can add in the dark from the front to blend in the tear.
Mix your colors then hold your brush near the torn area to see if you are close. Keep mixing until the color is just a bit lighter than the original paint color. Remember, it will dry a bit darker then what is on the brush.
Let’s get to repairing!
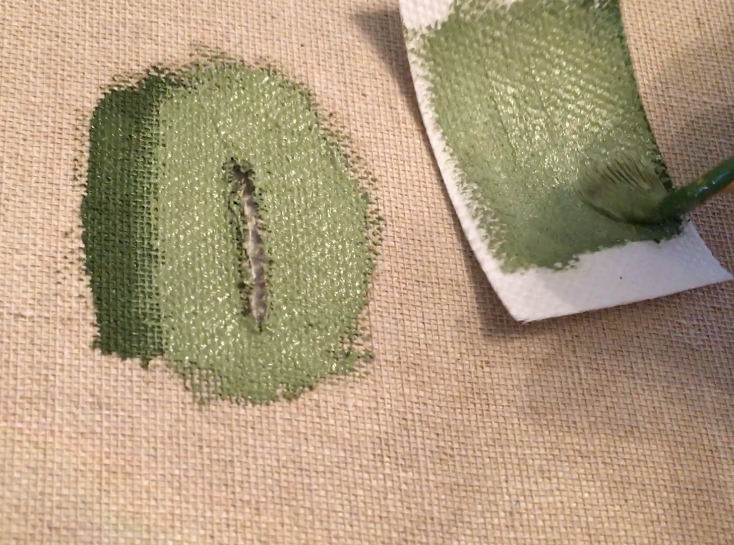
On the back side of the painting, paint the matching color all around the torn area up to the torn fibers, gently covering the fibers with your paintbrush but being careful not to load too much paint or it will squeeze through to the front of the painting when you put on your patch. Use some more paint and brush it onto the cut piece of canvas. You want the paint wet enough to stick, but again, not so that there is excess paint that will squeeze through the tear.
Smooth the Fibers and the Patch
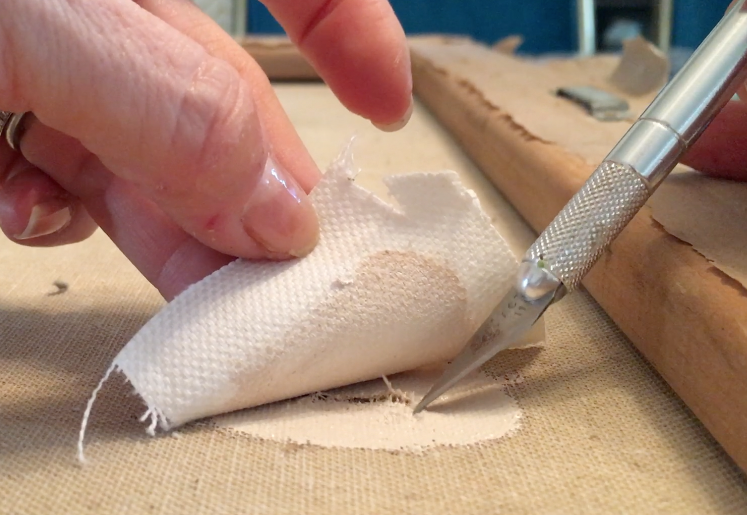
Gently place it parallel over the freshly painted area on the back of the painting. Place the patch on the tear 1/2 way, and use your blade or sharp point to smooth the fibers and do your best to straighten them out and make them lay as closely to how they originally fit together as possible. The goal is to flatten the fibers, and blend them together on both sides of the tear as much as you can. Use your fingers to smooth down the new piece of canvas. If the edges are sticking up, you can go back and trim them later.
A pro would spend hours repairing each fiber, but you are a super DIYer making a great fix that will work well enough…and no one will know but you. Pinky swear.
Let it dry
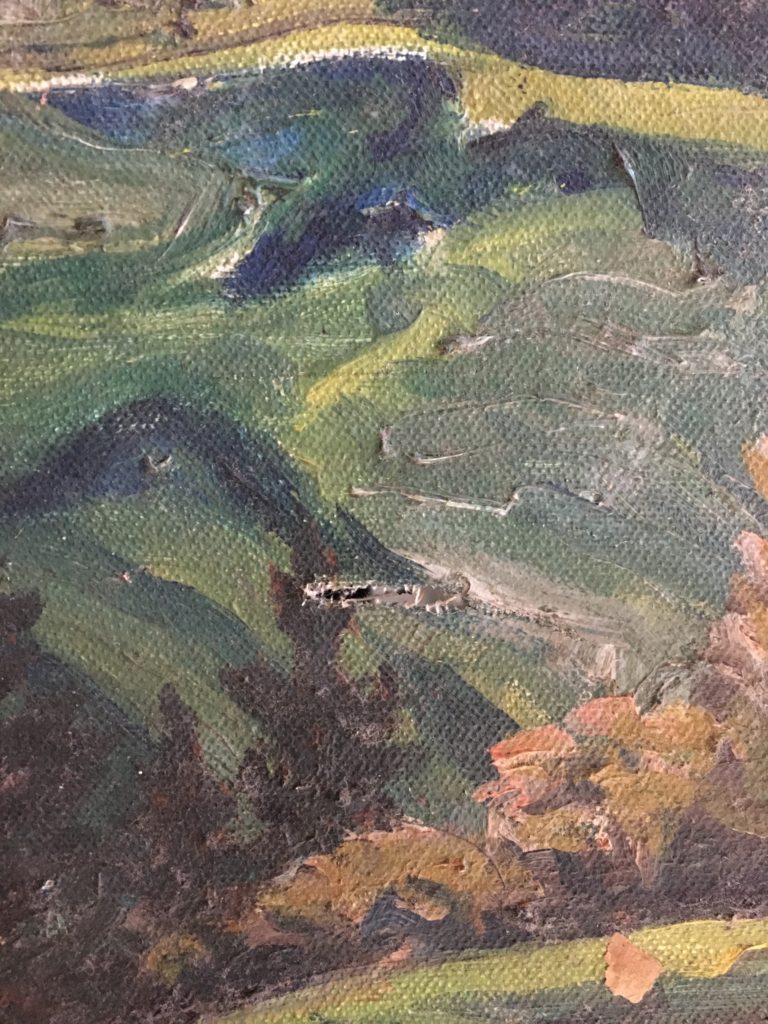
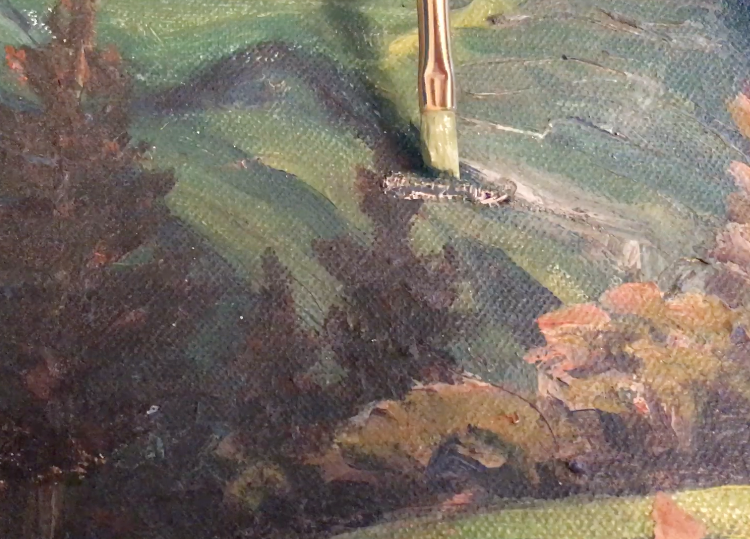
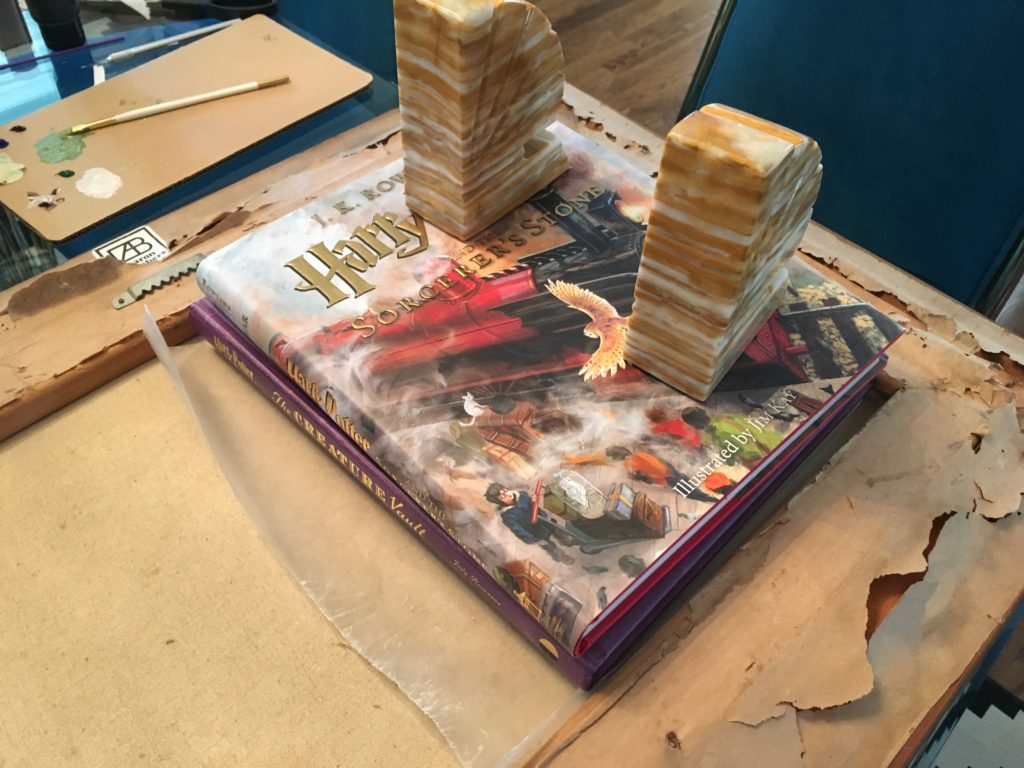
Gently flip the painting over and check your work, and clean up any excess paint that squeezed through. Find some books or anything flat and heavy and place them on top of some wax paper over the patch. This is where it is really important that the canvas is supported on the other side at the same level that the canvas sits naturally. In other words, you don’t want it to lift the painting off the table, or else when you leave it to dry, it can make marks where the canvas settled down around the edges of whatever you used to support it underneath.
Let the patches dry for about two hours with weights on them or until fully dry.
Fix the front of the painting
This is the part where a bit of artistic ability may come in handy, but if you blended the fibers well from the other side, there won’t be too much to blend in from the front. {{Unfortunately, I forgot to video or photograph this part of the fix, where I painted the tear, but there wasn’t a whole lot to do, so you didn’t miss much. But still, fail on my part, please forgive me!}}
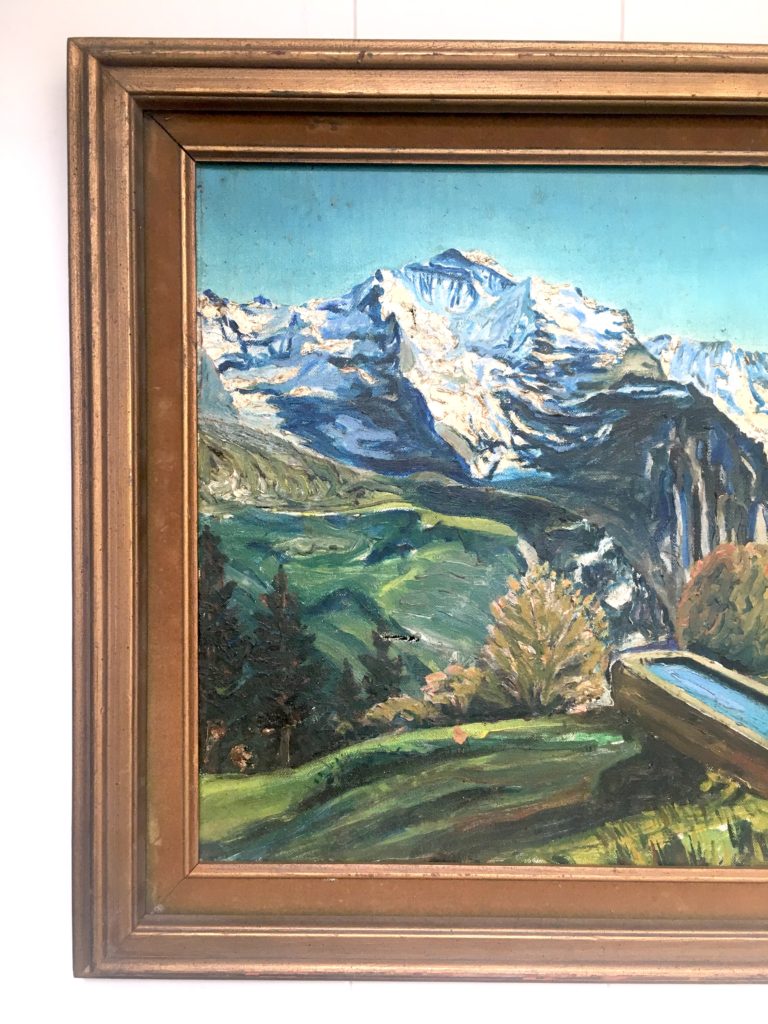
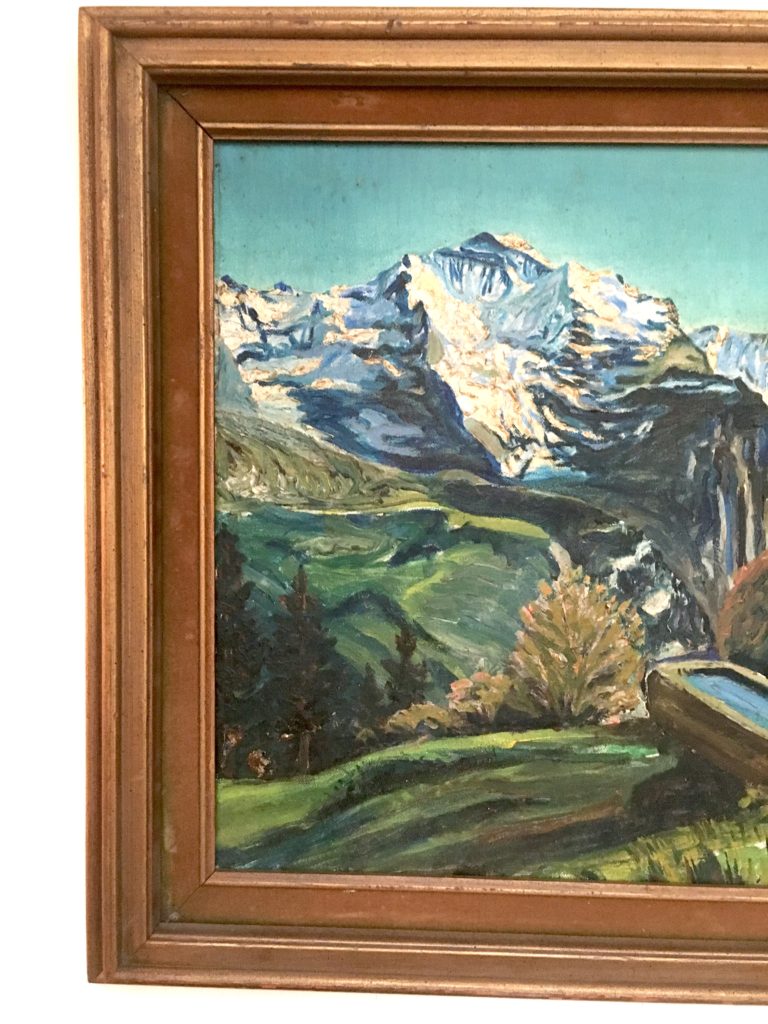
Be patient and go slowly. Use very small amounts of paint to blend the tear. Less is definitely more in this case. You can see that mine isn’t perfect, but this painting is hanging on the wall at Capo Beach and I keep forgetting that this was the painting that I fixed. You literally have to look for the tear to find it. My husband, Trip, originally couldn’t find it when I asked him to look for it.
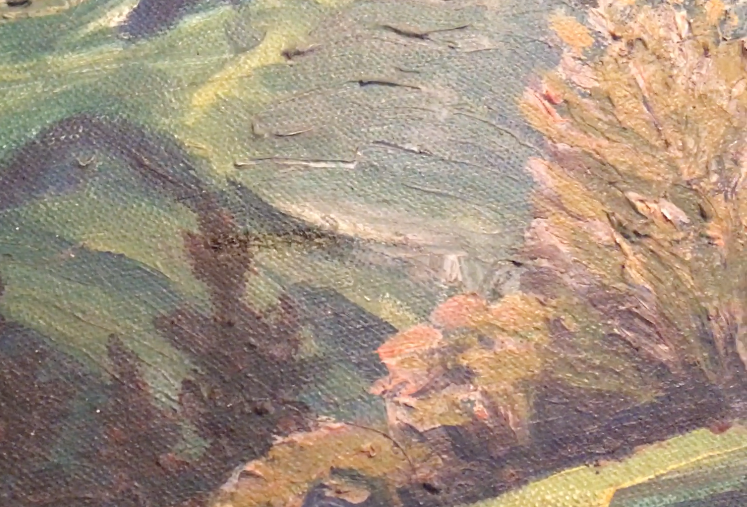
Check out the before and after!
Voila!
Once it’s dry, you’re good to go. …then pat yourself on the back for a job well done! Hang that puppy up on the wall and enjoy it’s new life. You did it!! Now you know how to fix a tear in an oil painting! Tell your friends, I bet they will be impressed. ? Now find something else to fix. You’re on a roll!

P.S. If you like this video and want to see more like it, sign up for my email list! We will soon be launching a special membership portal called the DIY Design Vault just for DIYers like you and only my tribe will be the first to know! It will be a well organized place where you will find my video library, all downloadable & other tools that will help you DIY your project like a pro!
PSS. This post contains affiliate links, which means I’ll get paid a small commission if you purchase through my links. It doesn’t cost you anything, it just acts like a virtual tip jar in return for the tip! {See what I did there?} Thank you in advance! xoxo